
In questa guida vediamo come collegare via mqtt un sonoff con tasmota e uno shelly 1/2.5/RGBW2 (io ho testo questi modelli altri non saprei).
Vediamo come e dove configurare un sonoff con tasmosta per collegarsi al broker mqtt:
Configurazione —-> Configurazione MQTT e inserire ip, user, password e topic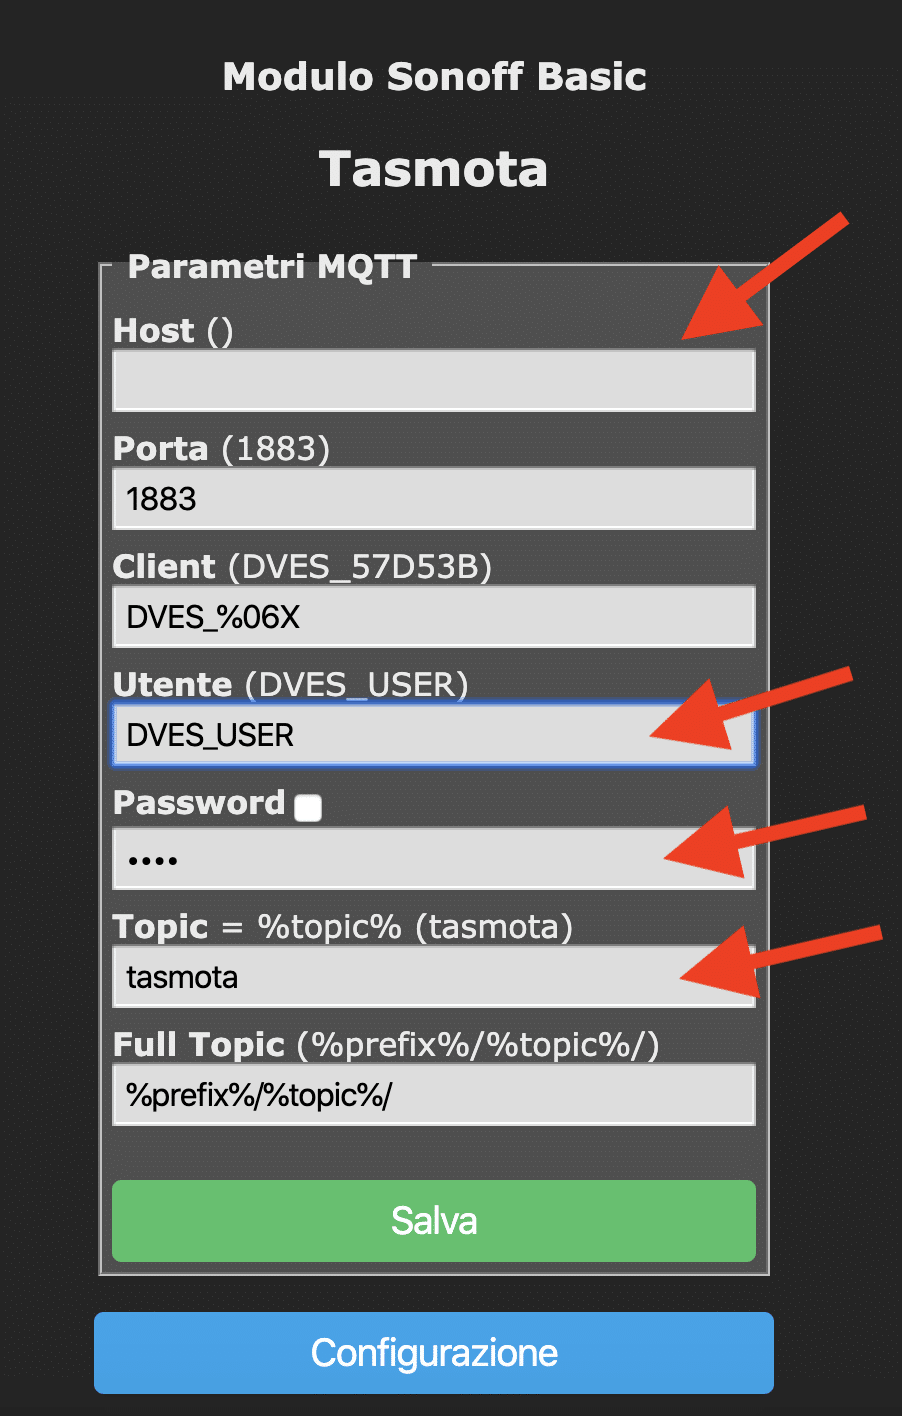
Potete configurare come switch o come light
switch:
  - platform: mqtt
    name: "Sonoff 1"
    state_topic: "stat/sonoff/POWER"
    command_topic: "cmnd/sonoff/POWER"
    availability_topic: "tele/sonoff/LWT"
    qos: 1
    payload_on: "ON"
    payload_off: "OFF"
    payload_available: "Online"
    payload_not_available: "Offline"
    retain: true
Questa è la configurazione del sonoff in home assistant
Adesso vediamo come configurare gli Shelly 1/2.5/RGBW2:
la pagina per tutti è Internet & Securit —-> Advence – Developer Setting
Inserire Username – Password – Server (ip:1883)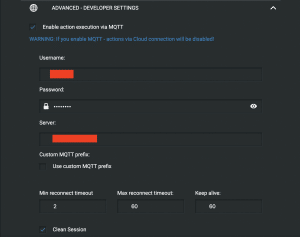
Ecco le configurazioni per i vari shelly:
light:
  - platform: mqtt
    name: "Lampadario"
    state_topic: "shellies/shelly1-XXXXXX/relay/0"
    command_topic: "shellies/shelly1-XXXXXX/relay/0/command"
    qos: 0
    payload_on: "on"
    payload_off: "off"
    payload_available: "true"
    payload_not_available: "false"
    optimistic: false
    retain: false

  - platform: mqtt
    schema: template
    name: "Striscia Led RGB"
    command_topic: "shellies/shellyrgbw2-XXXXXX/color/0/set"
    state_topic: "shellies/shellyrgbw2-XXXXXX/color/0/status"
    effect_list:
      - 0
      - 1
      - 2
      - 3
      - 4
      - 5
      - 6
    command_on_template: >
      {"turn": "on"
      {%- if brightness is defined -%}
      , "gain": {{brightness | float | multiply(0.3922) | round(0)}}
      {%- endif -%}
      {%- if red is defined and green is defined and blue is defined -%}
      , "red": {{ red }}, "green": {{ green }}, "blue": {{ blue }}
      {%- endif -%}
      {%- if white_value is defined -%}
      , "white": {{ white_value }}
      {%- endif -%}
      {%- if effect is defined -%}
      , "effect": {{ effect }}
      {%- endif -%}
      }
    command_off_template: '{"turn":"off"}'
    state_template: "{% if value_json.ison %}on{% else %}off{% endif %}"
    brightness_template: "{{ value_json.gain | float | multiply(2.55) | round(0) }}"
    red_template: '{{ value_json.red }}'
    green_template: '{{ value_json.green }}'
    blue_template: '{{ value_json.blue }}'
    white_value_template: '{{ value_json.white }}'
    effect_template: '{{ value_json.effect }}'
    qos: 2

  - platform: mqtt
    name: "Lampadario"
    state_topic: "shellies/shellyswitch25-XXXXXX/relay/0"
    command_topic: "shellies/shellyswitch25-XXXXXX/relay/0/command"
    qos: 0
    payload_on: "on"
    payload_off: "off"
    payload_available: "true"
    payload_not_available: "false"
    optimistic: false
    retain: false

  - platform: mqtt
    name: "Lampadario"
    state_topic: "shellies/shellyswitch25-XXXXXX/relay/1"
    command_topic: "shellies/shellyswitch25-XXXXXX/relay/1/command"
    qos: 0
    payload_on: "on"
    payload_off: "off"
    payload_available: "true"
    payload_not_available: "false"
    optimistic: false
    retain: false

cover:
  - platform: mqtt
    name: "Tenda Camera 1"
    state_topic: "shellies/shellyswitch25-XXXXXX/roller/0"
    command_topic: "shellies/shellyswitch25-XXXXXX/roller/0/command"
    position_topic: "shellies/shellyswitch25-XXXXXX/roller/0/pos"
    set_position_topic: "shellies/shellyswitch25-XXXXXX/roller/0/command/pos"
    qos: 0
    retain: false
    payload_open: "open"
    payload_close: "close"
    payload_stop: "stop"
    position_open: 100
    position_closed: 0
    optimistic: false
    value_template: '{{ value }}'
Queste sono alcune configurazioni che si possono usare con gli shelly.
Nella prossima guida vediamo come configurare dei sensori in mqtt e dei sensori per il monitoraggio del Raspberry.